In previous posts, we covered basic editing and motions. At green belt level, we’ll learn about getting into insert mode faster i.e. moving to a location and entering insert mode in one command. Then, we’ll cover a few more motions. Finally, we’ll look at jumps and navigating through your jump history.
Green Belt
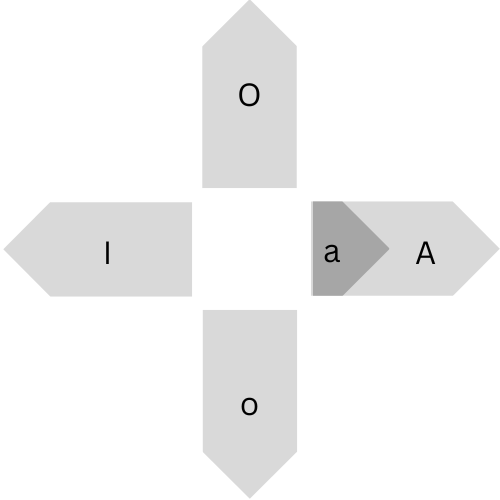
Insert Mode Shortcuts:
- I (capital i) to go into insert mode at before the first non-blank character on the line1.
- A to go into insert mode after the last character on the line2.
- o to go into insert mode on the next line below, O to go to insert mode on the line above.
- a to go to insert mode after the cursor.
- s to delete a character, then go into insert mode.
Horizontal motions:
- W to go forwards by a WORD, B to go backwards a WORD.
- e to go forwards to the end of a word, ge to go backwards to the end of the word.
Vertical motions:
- <Ctrl> + u to move up by half a screen, <Ctrl> + d to move down by half a screen.
- <Ctrl> + f to move up a page, <Ctrl> + b to move down by a page.
- <line-number> + G to go to the line number you want to go to.
Jumps
- A jump is a command that moves your cursor several lines away. We’ve come across a few of these already, such as “H”, “M”, “L”, “{” or “}”. You can navigate through your jump history by hitting <Ctrl> + o to go backwards (oldest) and <Ctrl> + i to go forwards through your jump list.
In part 4 at blue belt level, we’ll cover visual mode and more motions.
2 comments
Comments are closed.